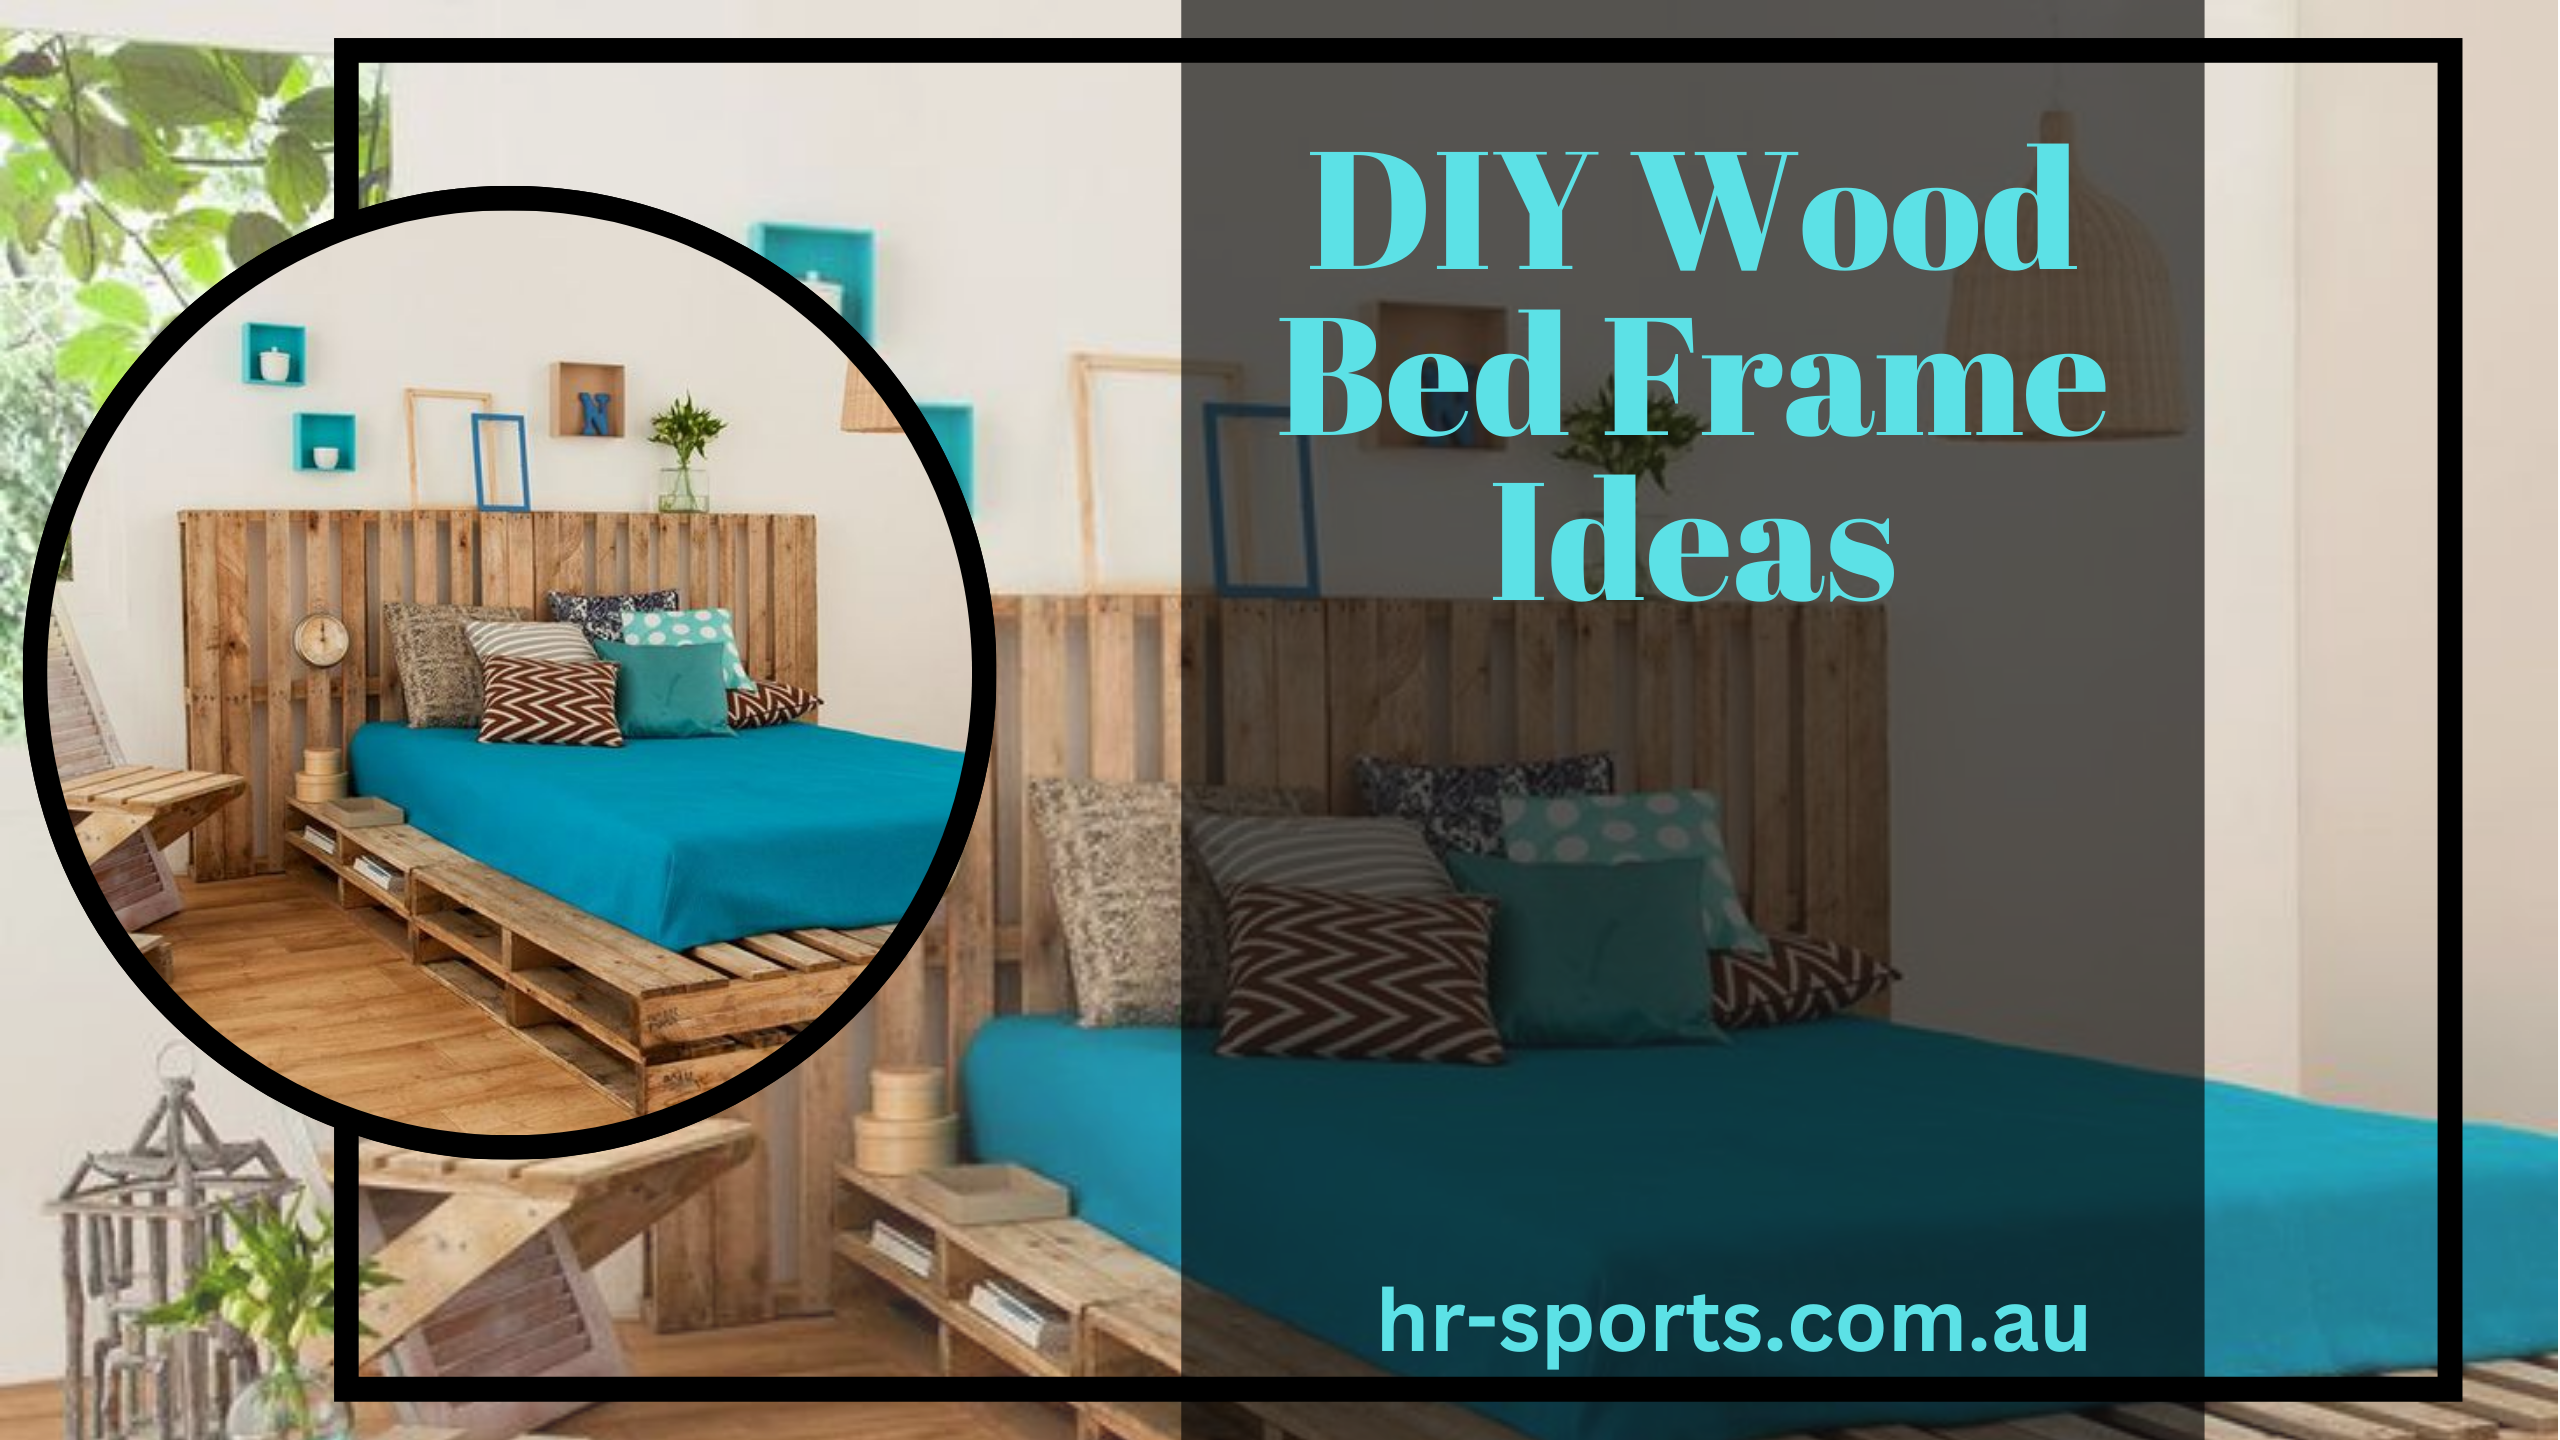
Cart review
Classic Platform Bed
Creating a classic platform bed can be the perfect starting point for DIY enthusiasts. The design is simple and efficient, and leaves room for personal style touches. Here's a detailed plan:
Materials and Tools:
- Solid wood boards
- Wood screws
- Wood glue
- Power drill
- Saw
- Measuring tape
- Sandpaper
.png)
Process:
Measure and Cut: First, measure your mattress. You'll want the platform to be slightly larger than your mattress, so add an extra inch to each side. Cut your wood to these measurements.
Construct the Base: Cut additional wood pieces to create supports for your platform. These should be spaced evenly across the underside of your bed.
Assemble: Using wood glue and screws, assemble your platform. Attach the support pieces to the underside of your main platform piece. Ensure everything is square and level.
Finishing Touches: Sand the entire piece to smooth out any rough edges. You can leave the wood natural, stain it, or paint it to match your decor.
This straightforward project can significantly impact your bedroom, creating a clean, modern aesthetic while providing a sturdy base for your mattress.
Four-poster Canopy Bed
If you're aiming for a touch of luxury and elegance, consider a four-poster canopy bed.
Materials and Tools:
- 4 long wooden posts
- Solid wood boards for the frame
- Screws and wood glue
- Power drill
- Saw
- Measuring tape
- Sandpaper
- Canopy fabric (optional)
.png)
Process:
Planning: Start by considering the height of your posts. They should be tall enough to create a dramatic effect but consider your ceiling height. Measure and cut your four posts.
Building the Frame: Construct a standard bed frame, ensuring it's sturdy and the right size for your mattress.
Attaching the Posts: Secure the posts to each corner of your bed frame. Ensure they're securely attached and levelled.
Adding the Canopy: If you choose to include a fabric canopy, drape it over the top of the posts. Secure it so it drapes beautifully and is secure.
This bed frame idea can transform your room into a sophisticated, romantic haven.
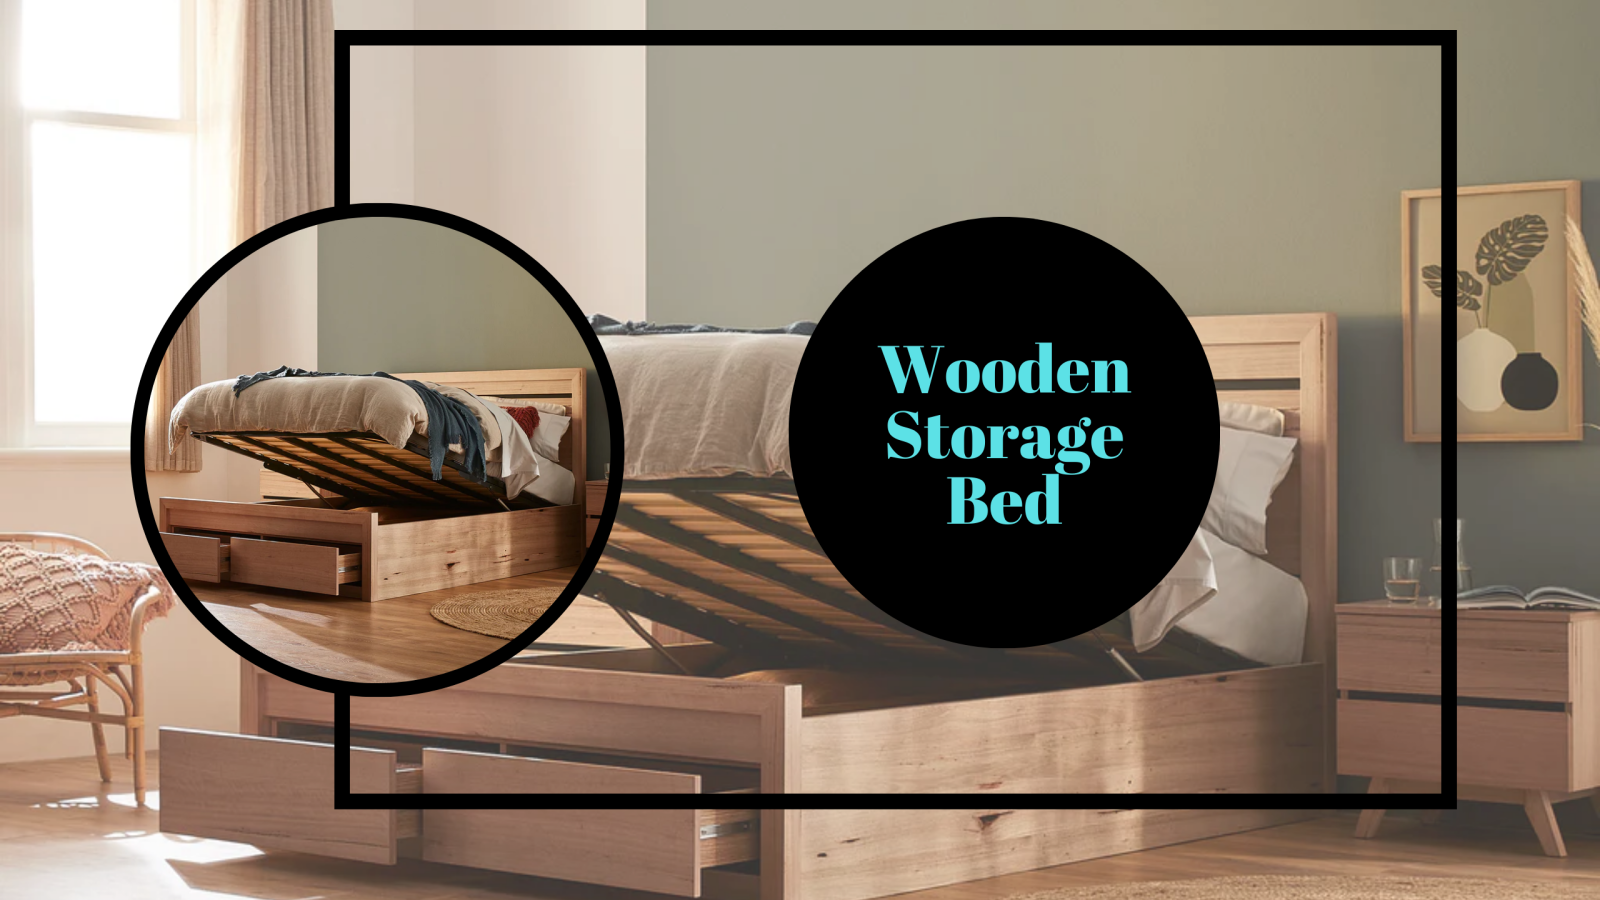
Storage Bed
Need more storage space in your bedroom? A storage bed can be an excellent solution.
Materials and Tools:
- Solid wood boards
- Drawer slides
- Screws and wood glue
- Power drill
- Saw
- Measuring tape
- Sandpaper
- Plywood for drawer bottoms
- Drawer pulls
Process:
Plan: Decide how many drawers you want and their dimensions. They should fit beneath the bed frame without touching the floor.
Build the Frame: Create a platform bed frame, leaving spaces for the drawers.
Construct the Drawers: Build drawer boxes from your wood and plywood. Attach drawer slides to the boxes and the inside of the bed frame.
Install the Drawers: Slide the drawers into the frame. Attach drawer pulls to the front for easy access.
Finishing Touches: Sand all pieces of the bed frame, paying particular attention to the drawers. Paint or stain your bed frame according to your preference.
A storage bed is a practical solution that also adds a stylistic touch to your bedroom. By investing your time in this project, you'll gain additional storage and a bespoke piece of furniture that meets your specific needs.
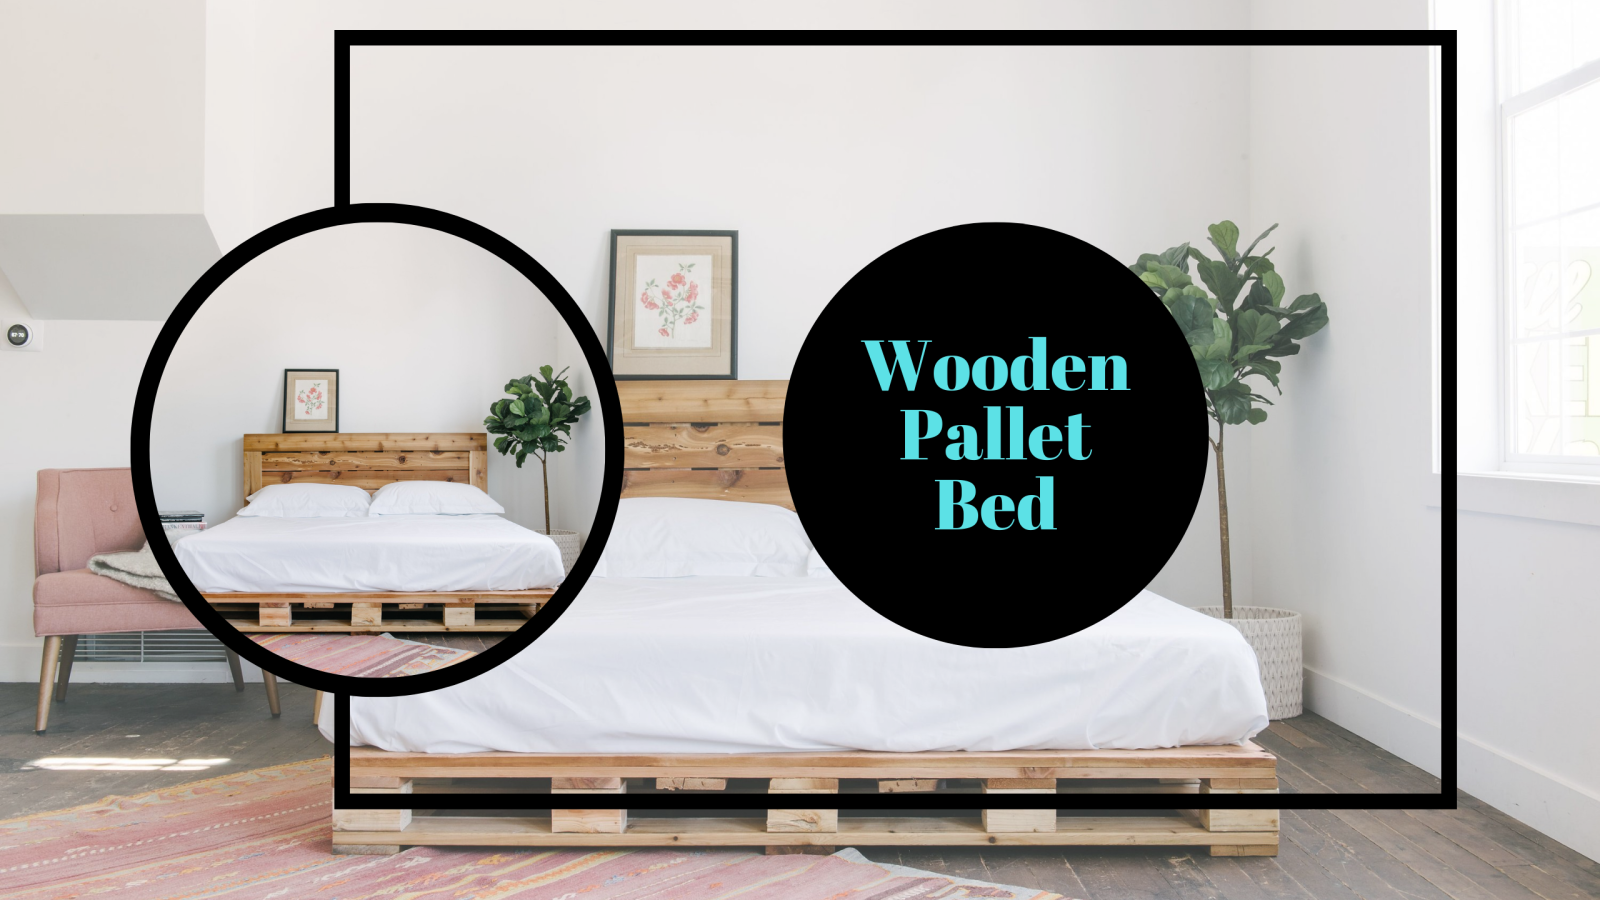
Pallet Bed
The pallet bed is a perfect project for those who want to combine simplicity, rustic charm, and sustainability.
Materials and Tools:
- Wooden pallets (quantity depending on desired height)
- Sandpaper or an electric sander
- Paint or wood stain (optional)
- Screws
- Power drill
Process:
Pallet Preparation: Inspect your pallets for any damage or protruding nails. Sand them thoroughly to ensure they are smooth and safe to use.
Design: Arrange your pallets on the floor to create the base of your bed. You can stack multiple layers for extra height. The size and shape depend on your mattress and room size.
Assembly: Secure the pallets together using the screws and power drill. Ensure the structure is stable.
Finishing Touches: Add a coat of paint or a wood stain if you want to change the colour of the bed. Remember to let it dry thoroughly before placing your mattress on top.
The rustic charm of a pallet bed can add character to your room while being friendly to the environment and your wallet.
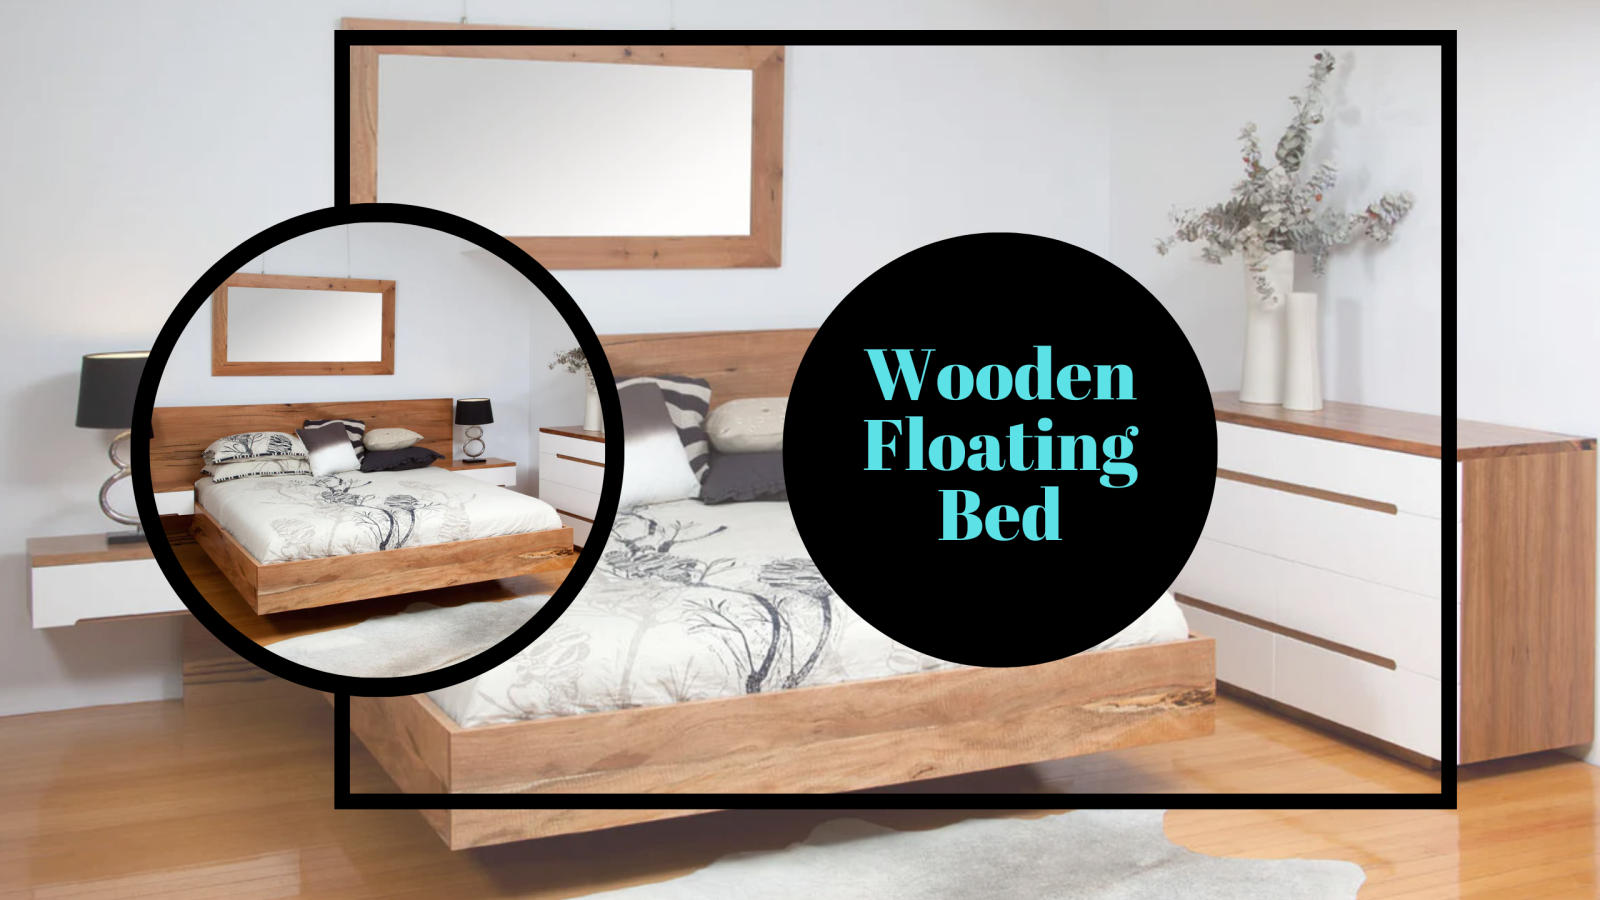
Floating Bed
The floating bed, an optical illusion that makes the bed appear as if it's floating above the ground, is a fun and contemporary option.
Materials and Tools:
- Solid wood boards
- Screws and wood glue
- Power drill
- Saw
- Measuring tape
- Sandpaper
- LED strip lights (optional)
Process:
Planning: Plan your design carefully. The main idea is to create a robust central support system and a slightly oversized platform.
Building the Frame: Construct your platform, ensuring it extends beyond the central support.
Central Support: Build the central support. It should be smaller than the platform so it's hidden from view.
Assembly: Attach the platform to the central support. Make sure everything is level and secure.
Optional Lighting: For extra effect, attach LED strip lights under the platform's edge, giving a glowing effect to intensify the floating illusion.
Finishing Touches: Sand and paint or stain your bed as desired.
The floating bed is a conversation starter and adds a unique modern design element to your bedroom.
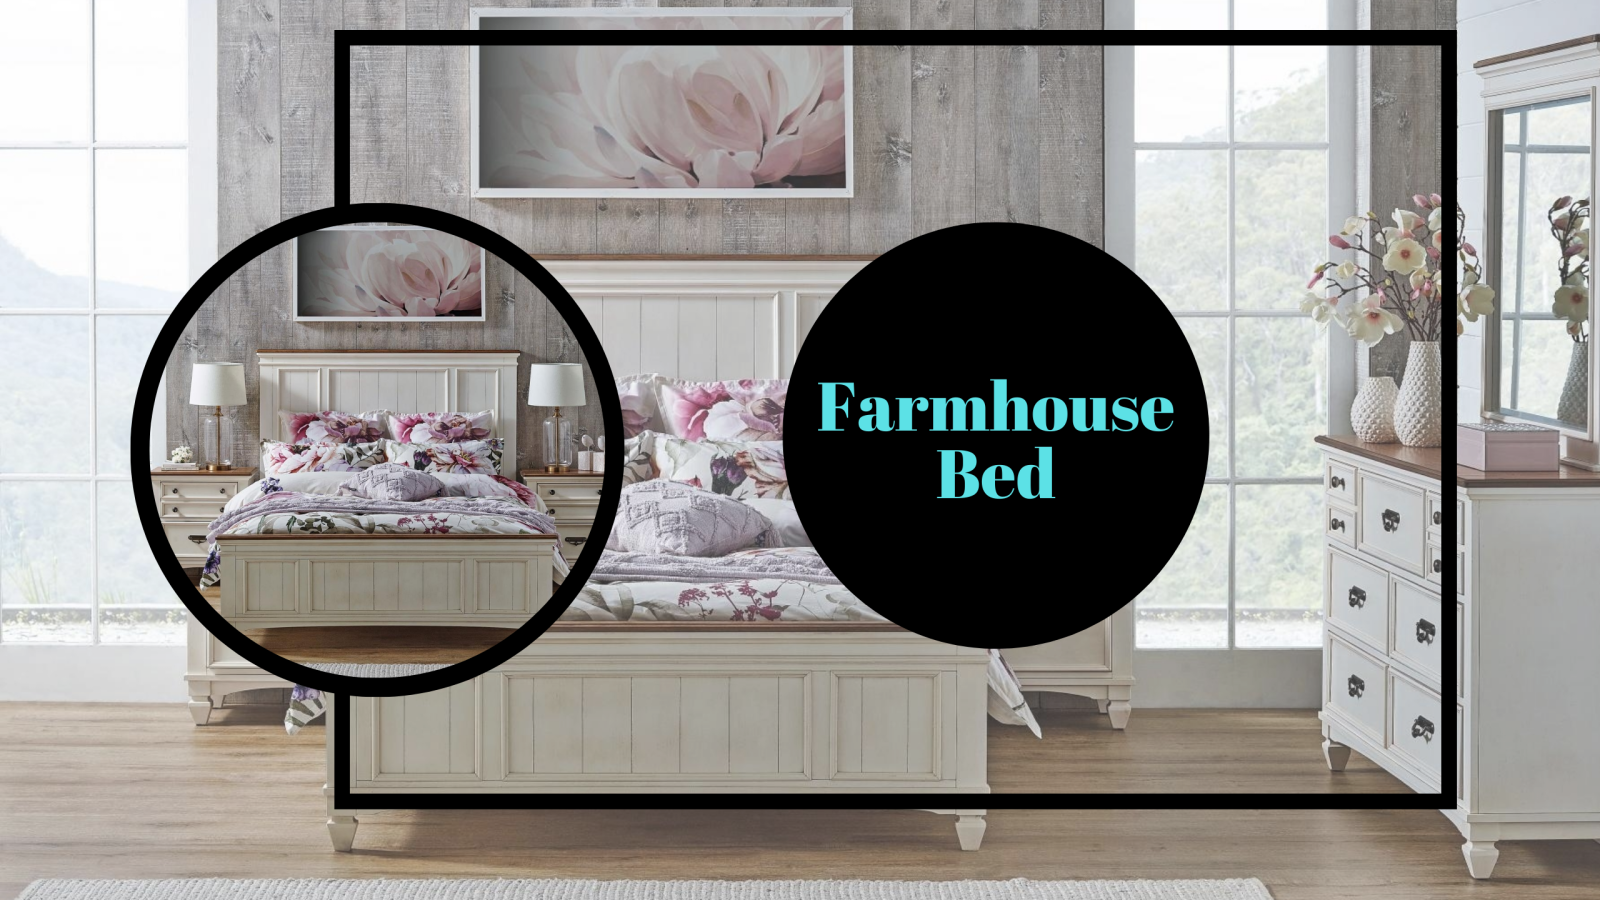
Farmhouse Bed
The farmhouse bed design is all about combining comfort with a rustic aesthetic. Here's how to create it:
Materials and Tools:
- Solid wood boards
- Wood screws
- Wood glue
- Power drill
- Saw
- Measuring tape
- Sandpaper
- Paint or wood stain
Process:
Headboard and Footboard: Plan out your headboard and footboard design. Typically, farmhouse beds have a high, planked headboard and a lower, matching footboard.
Building the Frame: Create a standard bed frame, attaching your headboard and footboard.
Finishing Touches: Sand the entire piece to smooth out any rough edges. You can then paint or stain your bed to achieve your desired look. A white-washed or distressed finish can contribute to the rustic aesthetic.
This type of bed adds a cozy, country feel to your room, perfect for creating a serene sleep sanctuary.
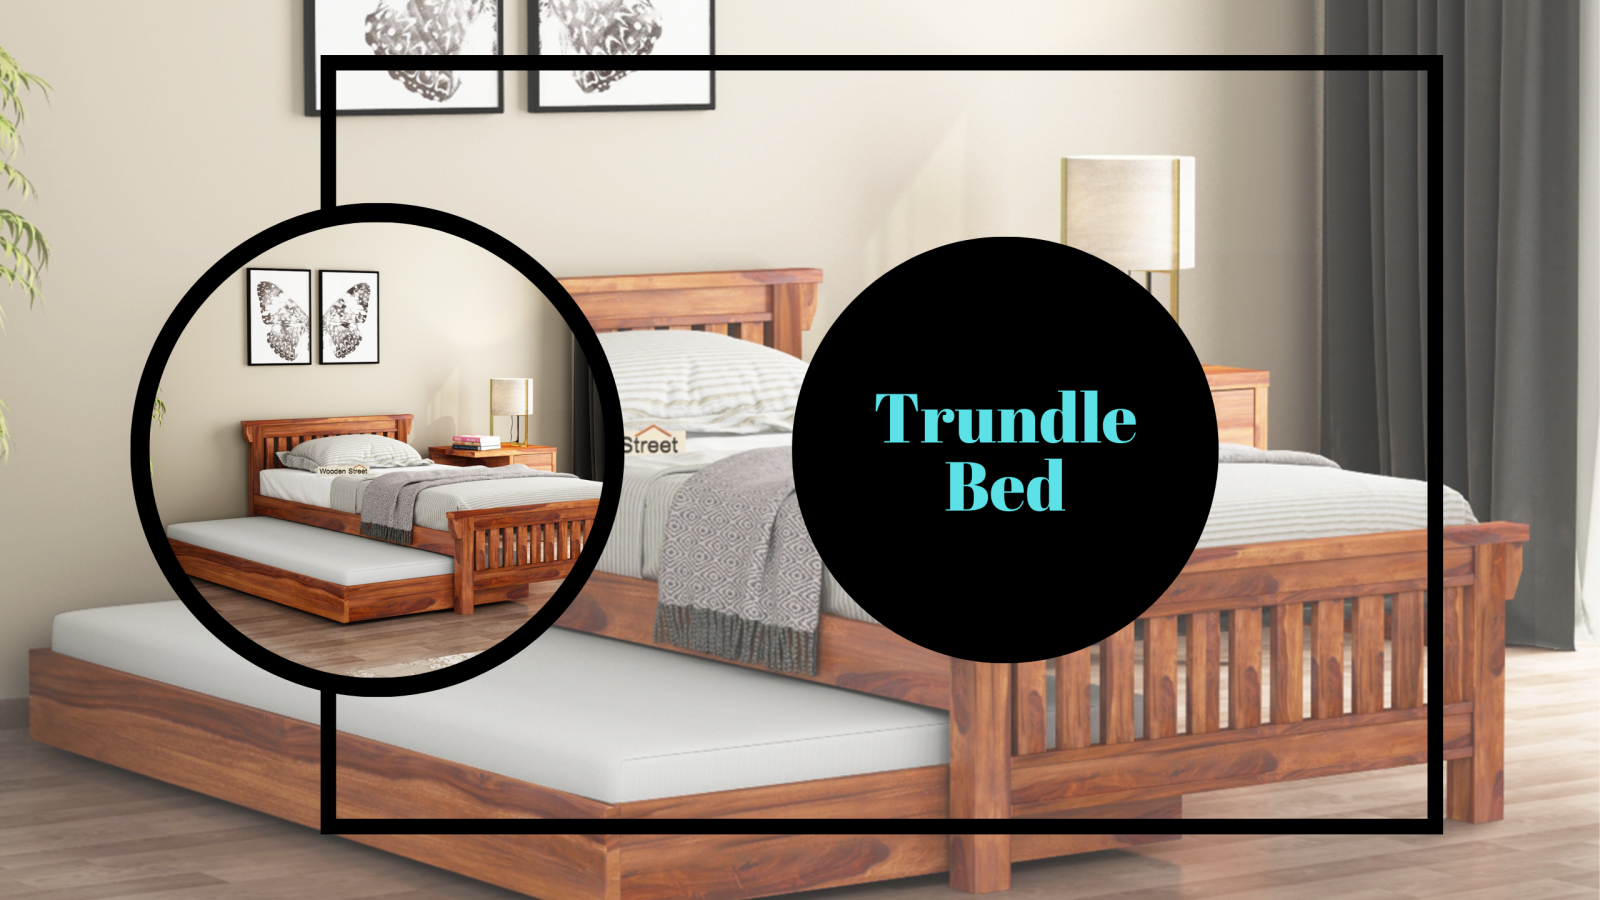
Trundle Bed
Trundle beds are a great space-saving solution. They provide a second sleeping space that can be neatly tucked away when not in use.
Materials and Tools:
- Solid wood boards
- Casters (wheels)
- Wood screws
- Wood glue
- Power drill
- Saw
- Measuring tape
- Sandpaper
- Paint or wood stain
Process:
Building the Main Frame: Start by building a standard bed frame. Make sure to leave enough clearance beneath for the trundle.
Building the Trundle: Construct a second, smaller frame that will fit under the main bed. Attach casters to the bottom to allow it to roll in and out easily.
Finishing Touches: Sand and finish both pieces as desired. Ensure the trundle rolls smoothly and that there is enough clearance for bedding.
A trundle bed is perfect for guest rooms, children's rooms, or any small space where you might occasionally need an extra bed.
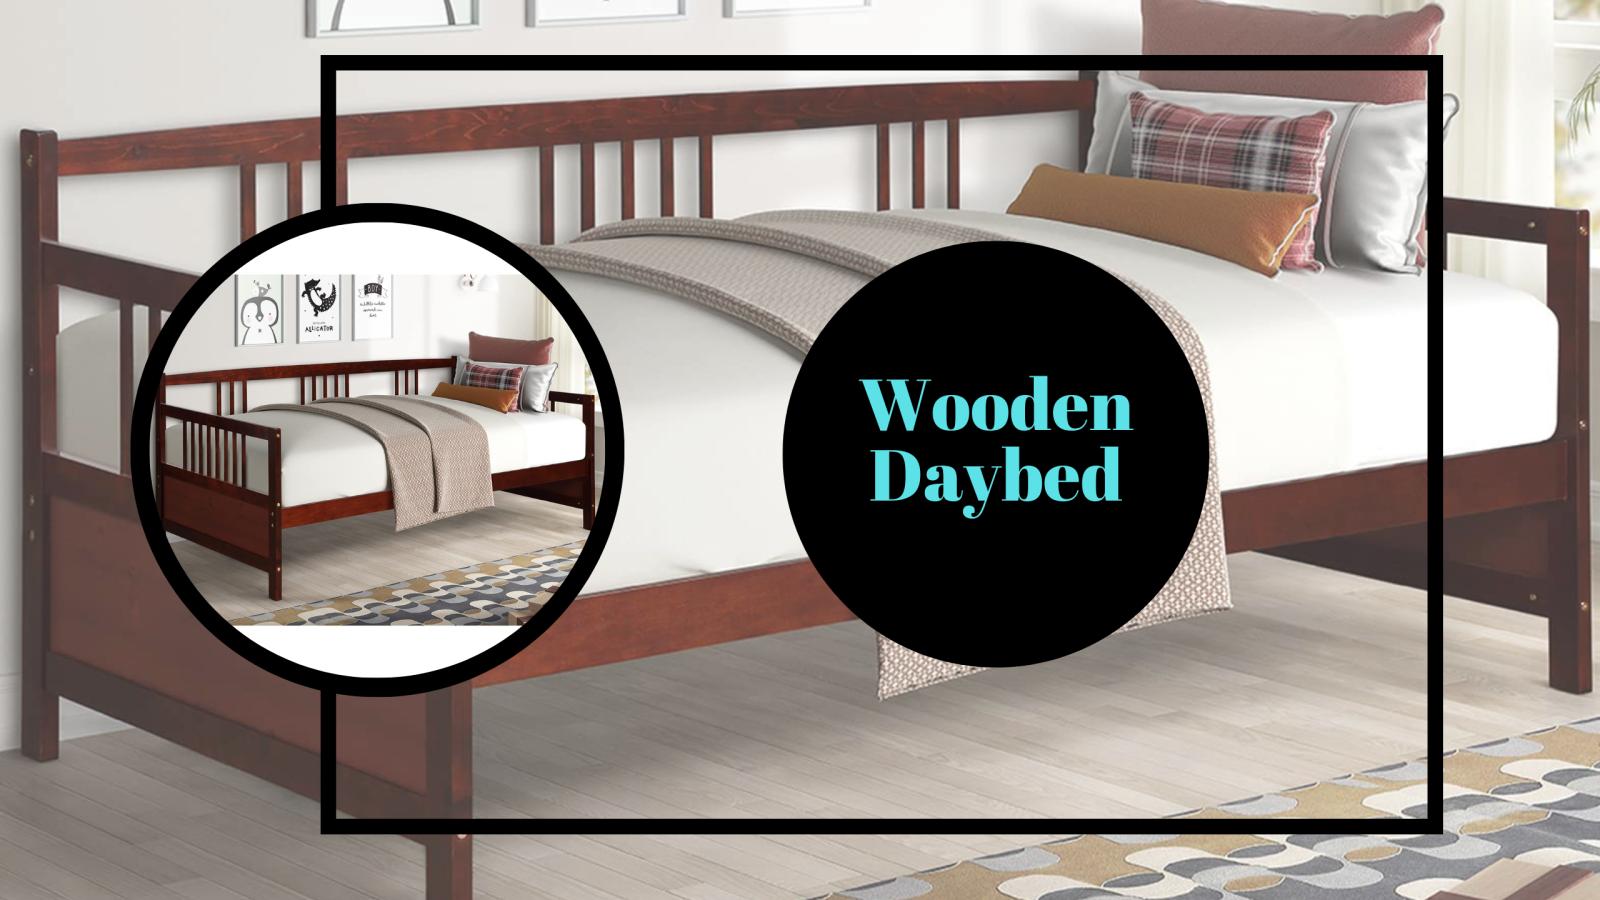
Daybed
A daybed serves double duty as a bed and a sofa, making it an ideal option for small spaces or multipurpose rooms.
Materials and Tools:
- Solid wood boards
- Wood screws
- Wood glue
- Power drill
- Saw
- Measuring tape
- Sandpaper
- Cushions and soft furnishings
Process:
Design: Plan your daybed design. Generally, daybeds are designed with three raised edges like a sofa.
Building the Frame: Construct your frame, including the back and sides. Ensure the frame is sturdy and the right size for your mattress.
Finishing Touches: Sand and finish your daybed as desired.
Accessorize: Add cushions and soft furnishings to transform the bed into a sofa for daytime use.
A daybed can be a stylish and functional addition to any room, offering a comfortable seating and sleeping solution.
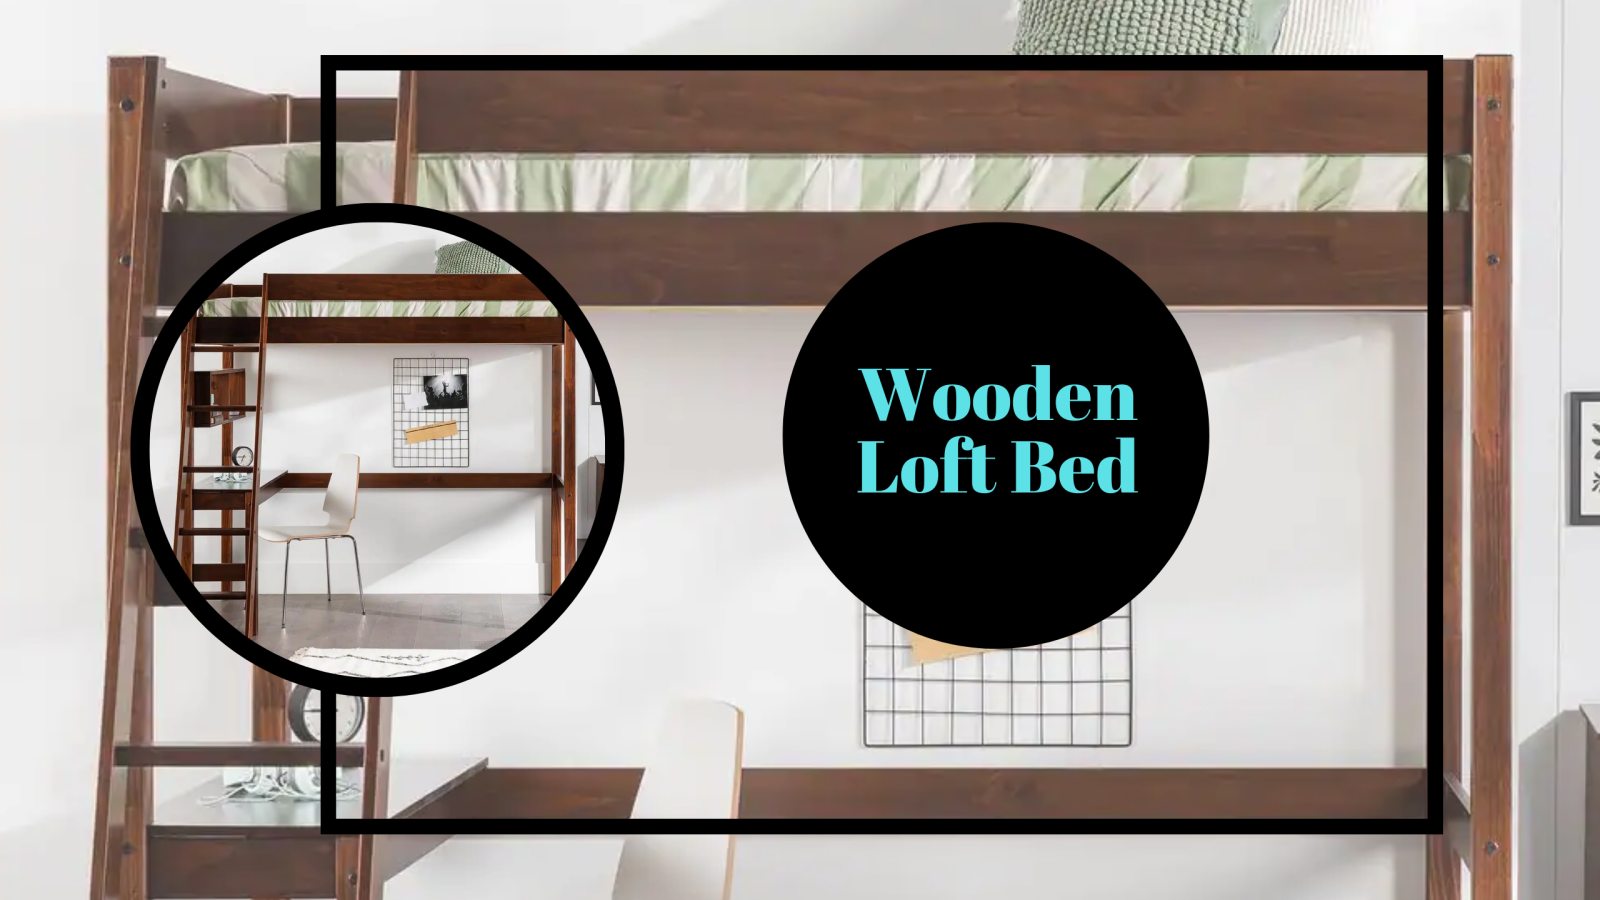
Loft Bed
A loft bed is an excellent space-saving design, particularly in children's bedrooms or small apartments.
Materials and Tools:
- Solid wood boards
- Wood screws
- Wood glue
- Power drill
- Saw
- Measuring tape
- Sandpaper
- Ladder or steps
- Safety rails
Process:
Design: Decide on the height of your loft bed, bearing in mind the ceiling height and the need for safety rails.
Building the Frame: Build a strong, secure frame for the bed. Ensure the frame is robust as it will be raised off the ground.
Safety Rails: Attach safety rails to the sides of the bed
Building the Legs: Construct strong, sturdy legs for your bed. Ensure they're well-secured and can support the weight of the bed and occupant.
Creating Access: Build a ladder or stairs for safe and easy access to the bed. Attach it securely to the frame.
Finishing Touches: Sand all surfaces to ensure there are no sharp edges or splinters. Paint or stain your loft bed in a colour that matches your room's decor.
By effectively utilizing the vertical space, a loft bed can open up your room for other furniture or activities.
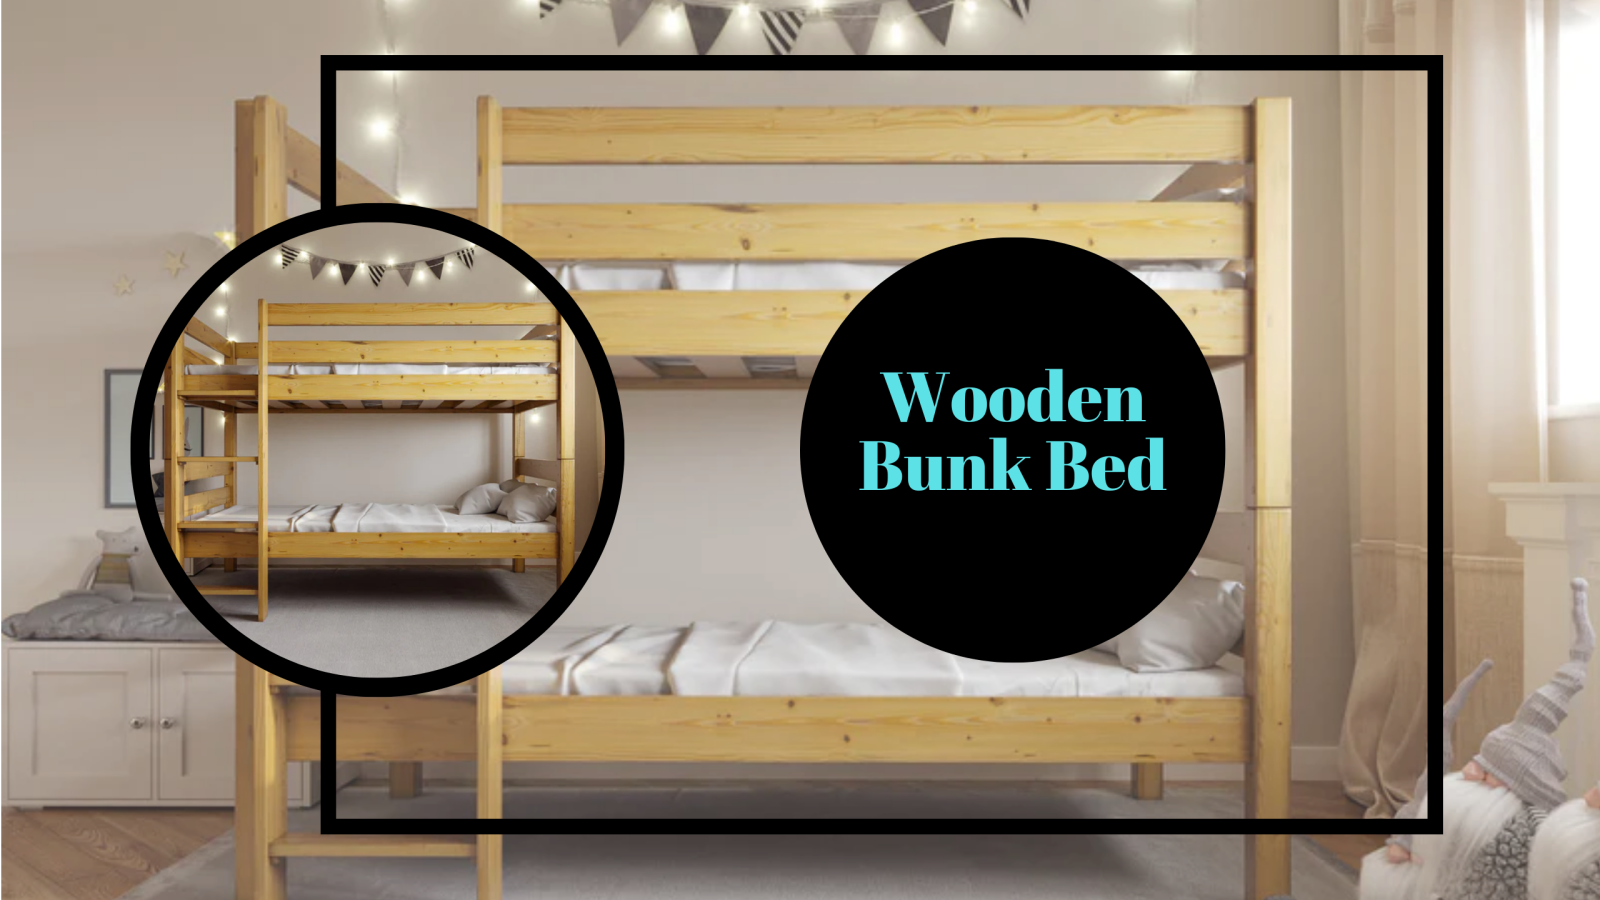
Bunk Bed
A traditional choice for shared bedrooms, bunk beds are a space-saving solution.
Materials and Tools:
- Solid wood boards
- Wood screws
- Wood glue
- Power drill
- Saw
- Measuring tape
- Sandpaper
- Ladder or steps
- Safety rails
Process:
Design: Plan your bunk bed design. Make sure to consider safety features such as a sturdy ladder and safety rails for the top bunk.
Building the Frames: Construct two-bed frames. One will need to be raised off the ground, so make sure your design includes strong, sturdy legs.
Stack and Secure: Stack the bed frames and secure them together. This is a crucial step to ensure the beds are safe and stable.
Safety Rails and Ladder: Attach safety rails to the sides of the top bunk. Then, build a sturdy ladder for access to the top bunk. Make sure it's securely attached to the bed frame.
Finishing Touches: Sand all surfaces and edges to make sure everything is smooth. Paint or stain your bed to match your decor.
Bunk beds are not only functional, but they can also add a fun element to a child's bedroom.
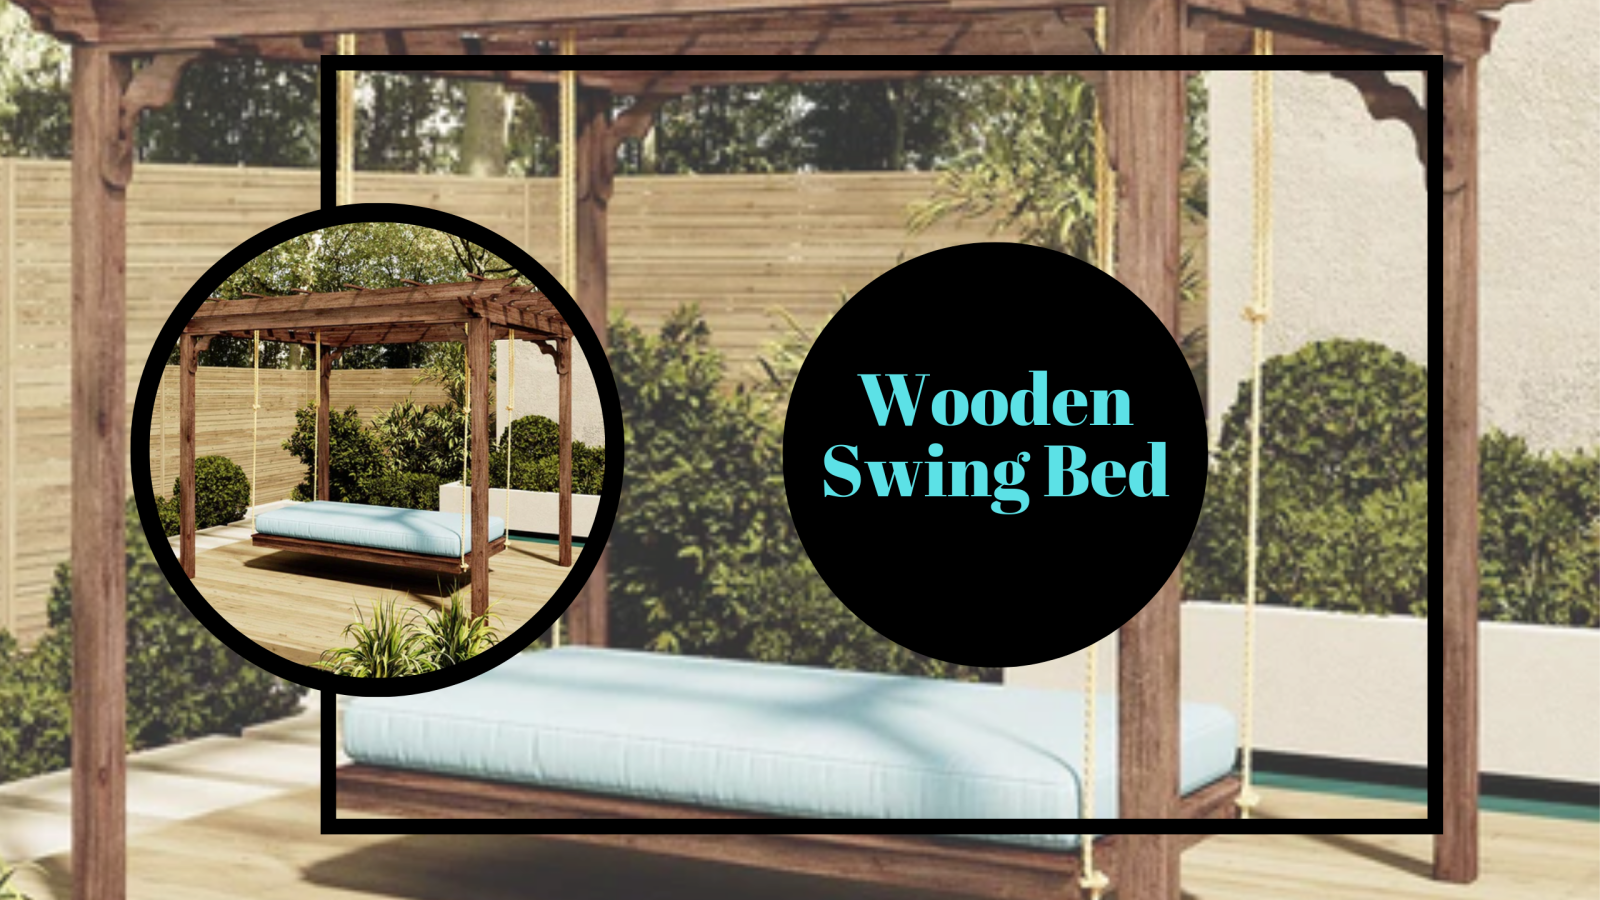
Swing Bed
The swing bed is a unique and comfortable bed option that brings the relaxation of a hammock to your bedroom or outdoor space.
Materials and Tools:
- Solid wood boards
- Wood screws
- Wood glue
- Power drill
- Saw
- Measuring tape
- Sandpaper
- Strong rope or chains
- Hooks for hanging
Process:
Building the Frame: Construct a sturdy bed frame. This will be hanging, so make sure all joints are secure.
Attach the Rope or Chains: Drill holes in each corner of the bed frame, then thread the rope or attach the chains. Ensure everything is secure and can bear the weight of the bed and its occupants.
Hang the Bed: Hang your bed from strong, stable supports. This could be robust ceiling beams if indoors, strong tree branches or a purpose-built stand if outdoors.
Finishing Touches: Sand all surfaces for a smooth finish. Paint or stain the wood as desired.
A swing bed provides a whimsical touch to your space and can provide a comfortable, relaxing spot to read nap or sleep.
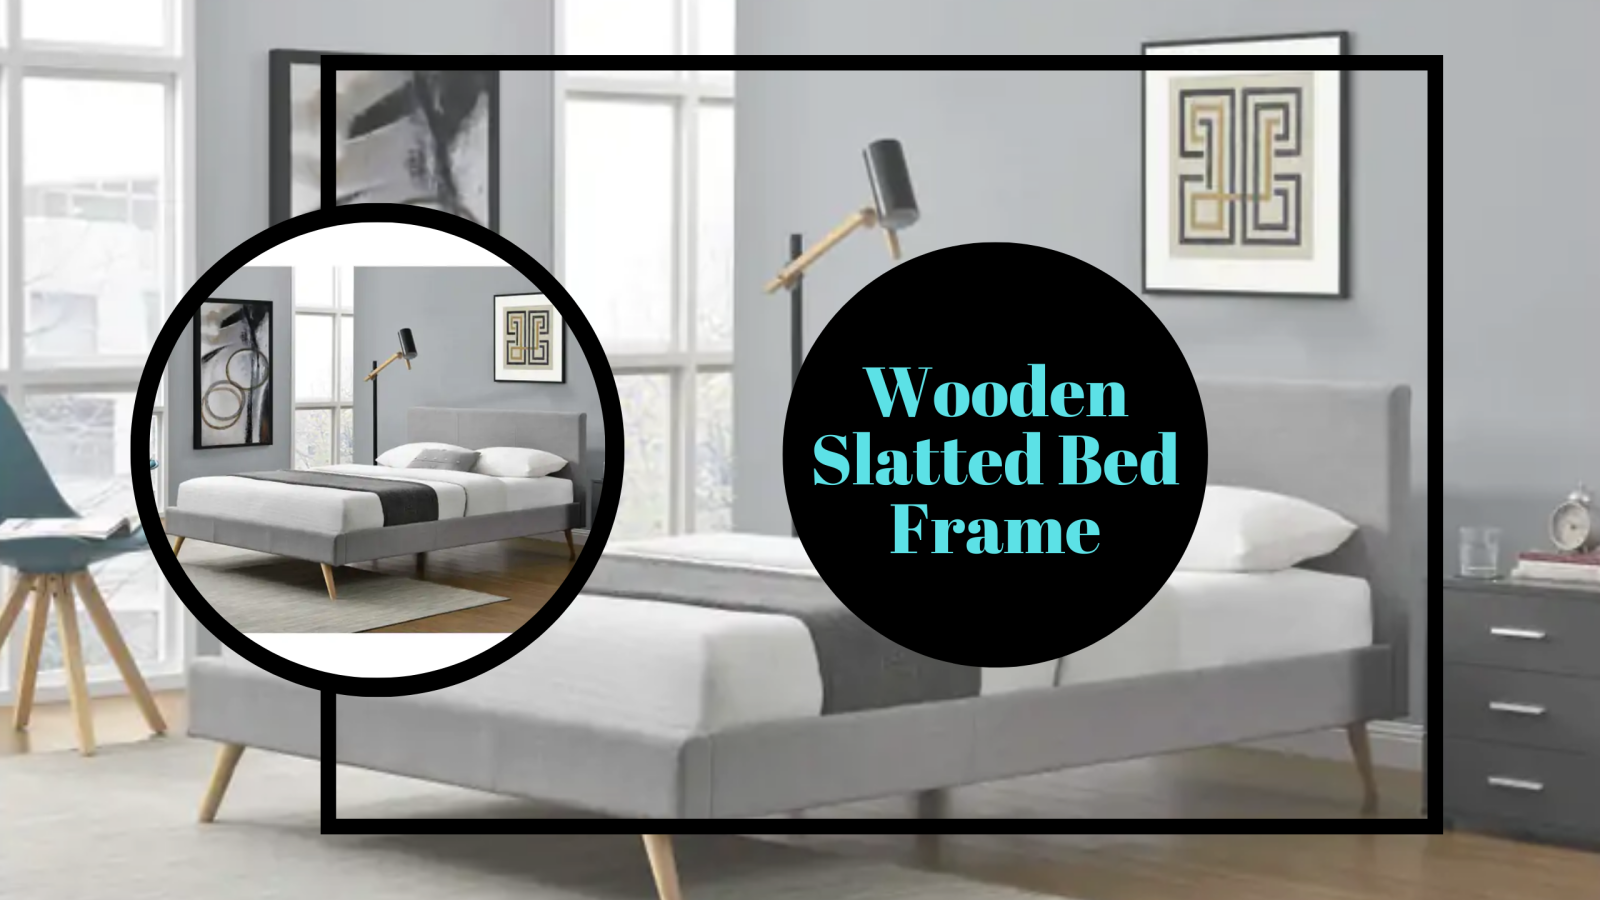
Slatted Bed Frame
The slatted bed frame offers excellent support and ventilation for your mattress.
Materials and Tools:
- Solid wood boards
- Wood screws
- Wood glue
- Power drill
- Saw
- Measuring tape
- Sandpaper
Process:
Building the Frame: Construct a sturdy bed frame, leaving room for slats across the width of the bed.
Adding the Slats: Measure, cut, and place your slats. They should be evenly spaced for proper mattress support.
Finishing Touches: Sand the bed frame and slats for a smooth finish. Paint or stain as desired.
Also Read: Everything You Need to Know Double Bed Frames
The slatted bed frame offers a clean, modern aesthetic while promoting airflow around your mattress.
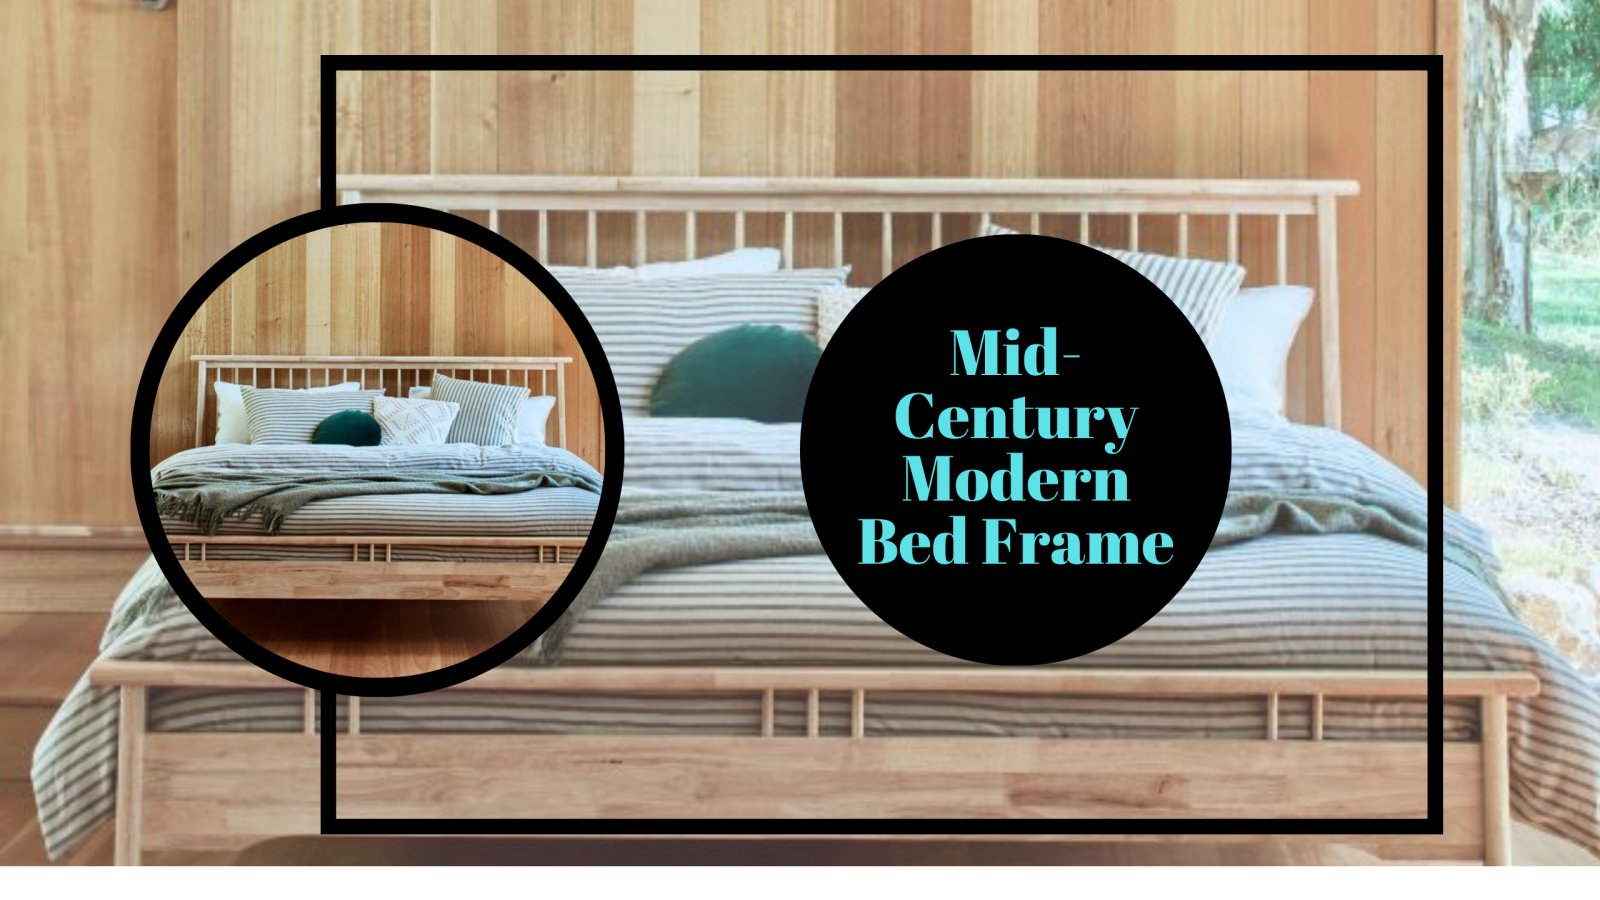
Mid-Century Modern Bed Frame
This bed frame design incorporates the clean lines and natural wood finishes popular in mid-century modern design.
Materials and Tools:
- Solid wood boards
- Wood screws
- Wood glue
- Power drill
- Saw
- Measuring tape
- Sandpaper
- Hairpin legs
Process:
Building the Frame: Construct your bed frame, incorporating clean, straight lines indicative of mid-century design.
Adding Legs: Attach four hairpin legs to the corners of your bed frame. These are signature features of mid-century modern furniture.
Finishing Touches: Sand the bed frame for a smooth finish. Opt for a natural wood stain to stay true to mid-century aesthetics.
The mid-century modern bed frame is an excellent choice for design enthusiasts, adding a retro, yet timeless charm to your bedroom.
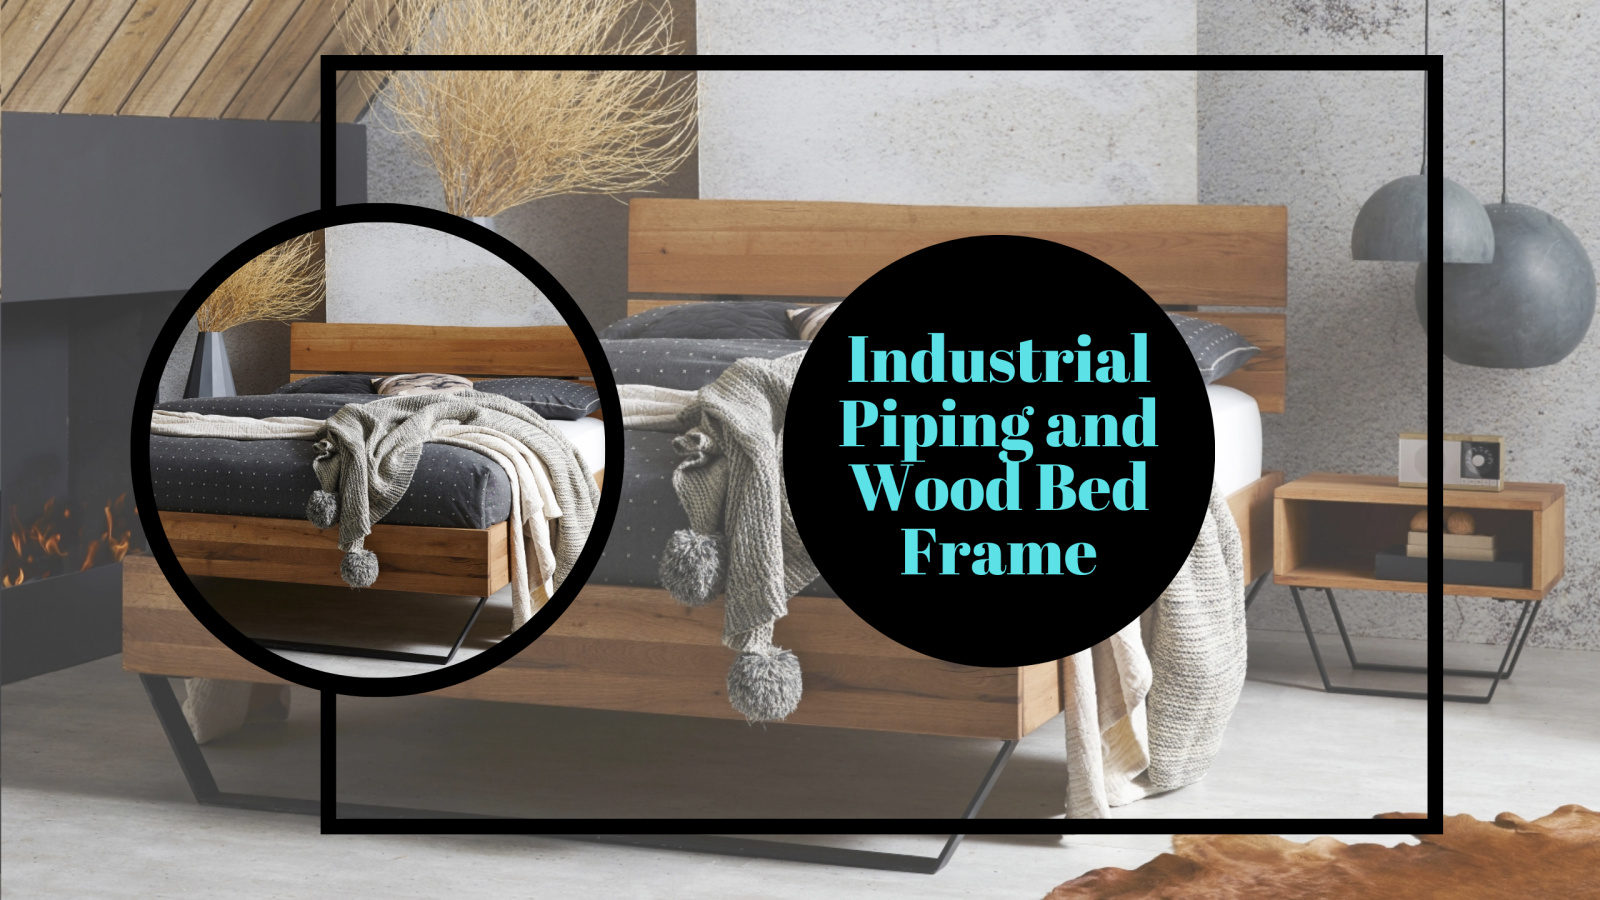
Industrial Piping and Wood Bed Frame
Combine the warmth of wood with the cool, industrial appeal of metal piping in this unique bed frame.
Materials and Tools:
- Solid wood boards
- Wood screws
- Wood glue
- Power drill
- Saw
- Measuring tape
- Sandpaper
- Metal pipes and fittings
Process:
Building the Frame: Construct your bed frame using solid wood boards. Leave room at each corner for the piping.
Adding the Pipes: Attach metal pipes at each corner of your bed frame. This will create an industrial-style post at each corner.
Finishing Touches: Sand the bed frame for a smooth finish. Stain the wood as desired, ensuring the stain complements the colour of the pipes.
The industrial piping and wood bed frame bring a unique, edgy aesthetic to your bedroom, perfect for an urban loft or industrial design scheme.
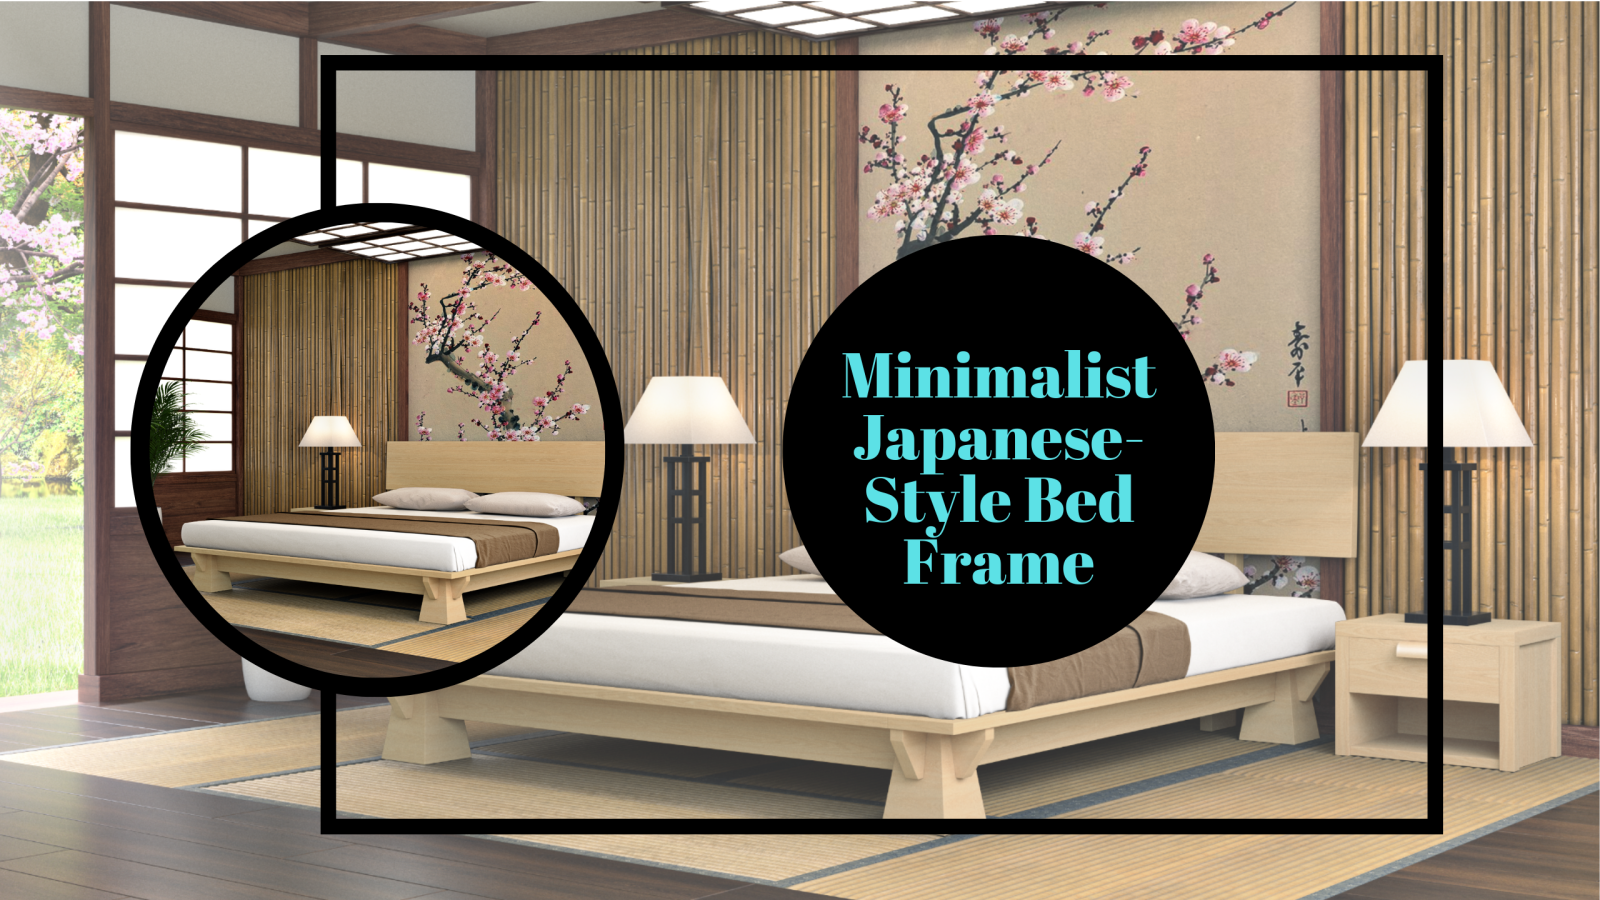
Minimalist Japanese-Style Bed Frame
A Japanese-style bed frame, also known as a tatami bed, offers a minimalist design with a low profile.
Materials and Tools:
- Solid wood boards
- Wood screws
- Wood glue
- Power drill
- Saw
- Measuring tape
- Sandpaper
Process:
Building the Frame: Construct a low-lying bed frame. Japanese-style bed frames are often only a few inches off the ground.
Finishing Touches: Sand the bed frame for a smooth finish. Use a natural wood stain to complete the minimalist aesthetic.
The minimalist Japanese-style bed frame can bring tranquillity and simplicity to your bedroom, in line with the principles of Zen design.
Conclusion:
Your bed is the focal point of your bedroom, and its design plays a crucial role in the aesthetic and feel of the room. Opting for a DIY approach when choosing your bed frame can offer endless possibilities for customization, allowing you to craft a piece that reflects your personal style, meets your specific needs, and perhaps even challenges your woodworking skills.
From the classic elegance of a four-poster bed, the practicality of a storage bed, the rustic charm of a pallet bed, to the optical illusion of a floating bed - there's a bed frame style to suit every room and individual. For those who desire added functionality, designs such as trundle beds, daybeds, or loft beds can maximize space while ensuring comfort.
More unique designs, like the swing bed, bring a whimsical touch to your home or outdoor space, while designs inspired by specific eras or cultures, like the mid-century modern or minimalist Japanese-style bed frames, can transport your bedroom to a different time or place. If you're seeking a combination of materials, a bed frame incorporating both wood and industrial piping can bring a contemporary, urban aesthetic to your room.
Regardless of the style or design you choose, the key to a successful DIY bed frame is careful planning and preparation. Ensure you have the necessary materials and tools before you begin and don't forget to prioritize safety, especially for designs like bunk or loft beds.
Remember, your DIY bed frame is an expression of your creativity and style. So, embrace the process and look forward to the satisfaction that comes with resting on a bed that's the product of your own craftsmanship. Happy building!


